
Amazon : Configure an AWS web server
Turn On EC2 Machine Into Classic Web Server


JUST IMAGINE:
Whenever you want to do development or coding stuff you go ahead and buy laptop or desktop and then in that machine you install packages that are required you to do development work and along with that you also run a development server to check what you are building as soon as you keep running those development servers (local servers) you can serve this in your network to anybody and you can also do config through which anyone access your websites from that laptop this is possible, But what not possible is to keep your laptop up and running for days, months and years....
 This is what amazon does amazon provides the instances which can be really-really powerful, these are not your virtual machines in your computer they are heavy optimized for web load and anything comes on internet. so, that's why we use these production level servers to move things into production.
What Is Elastic Compute Cloud?
Amazon Elastic Compute Cloud (Amazon EC2) is a web service that provides secure, resizable compute capacity in the cloud. It is designed to make web-scale cloud computing easier for developers. Amazon EC2’s simple web service interface allows you to obtain and configure capacity with minimal friction. It provides you with complete control of your computing resources and lets you run on Amazon’s proven computing environment.
Now we will Create EC2 instance :
STEP-1
First of login to your aws account or if you don't have please create one.
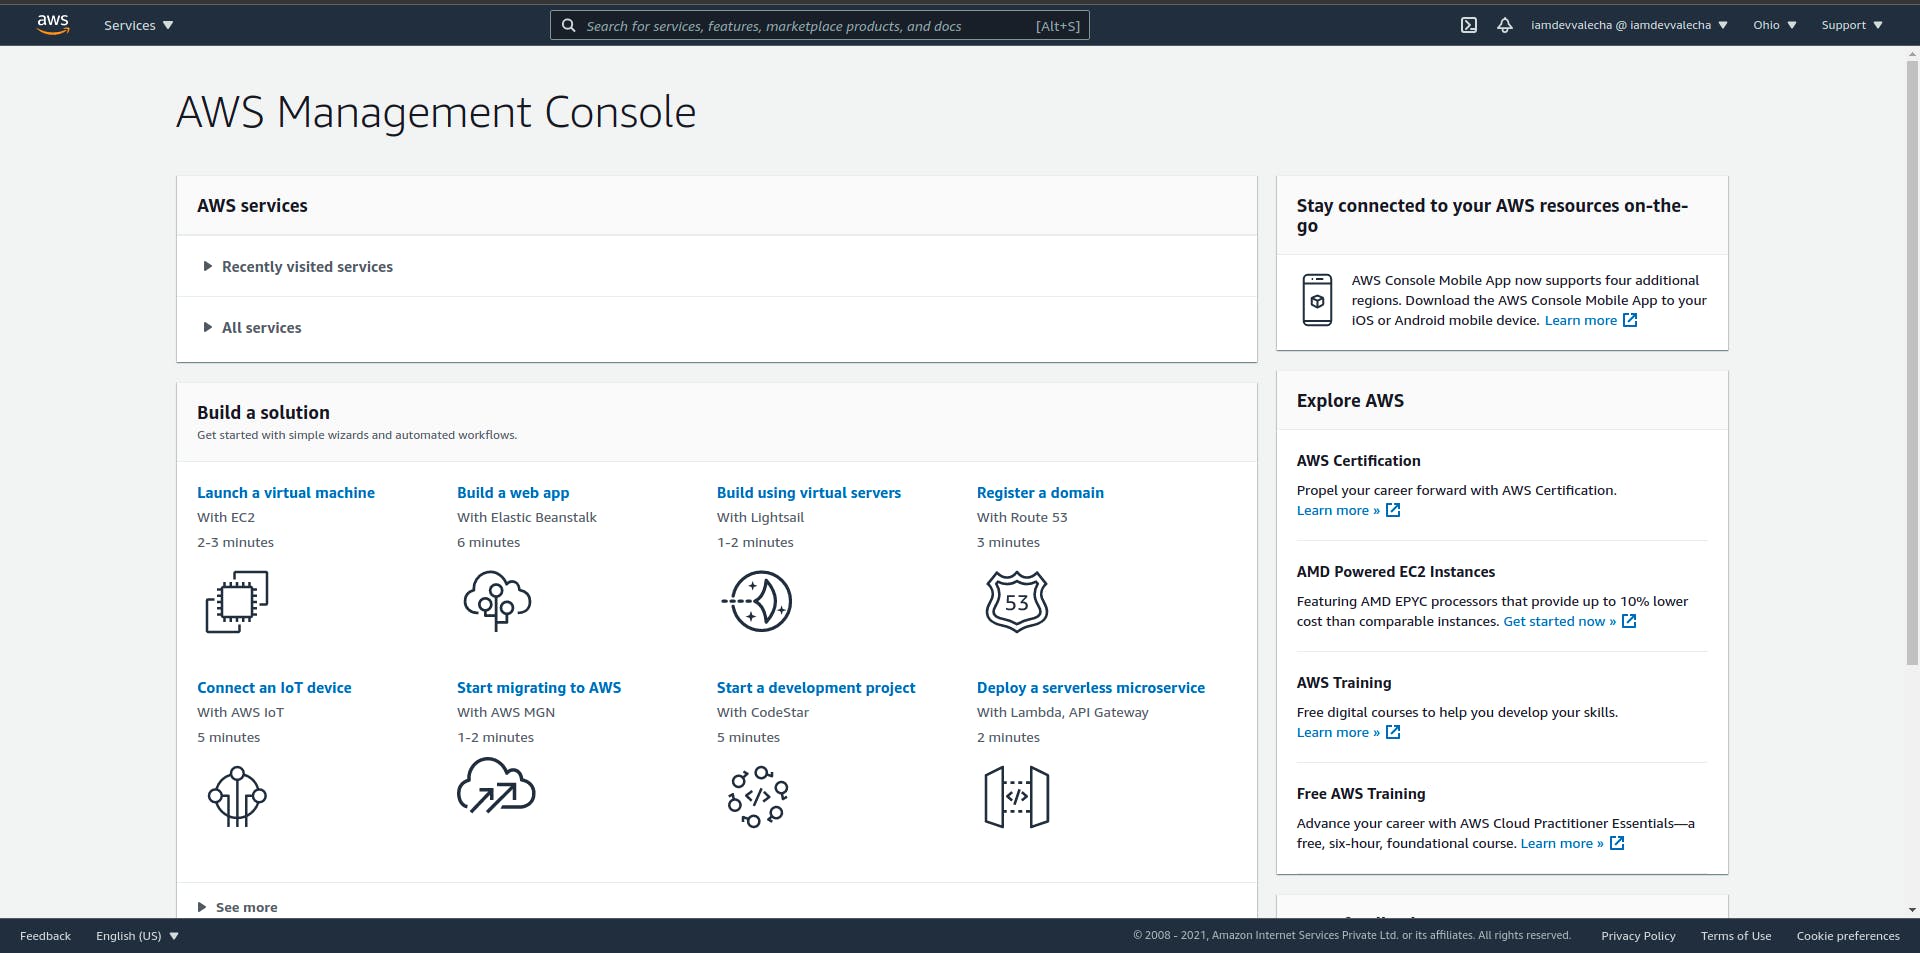
Now, we are the dashboard of aws account
STEP-2
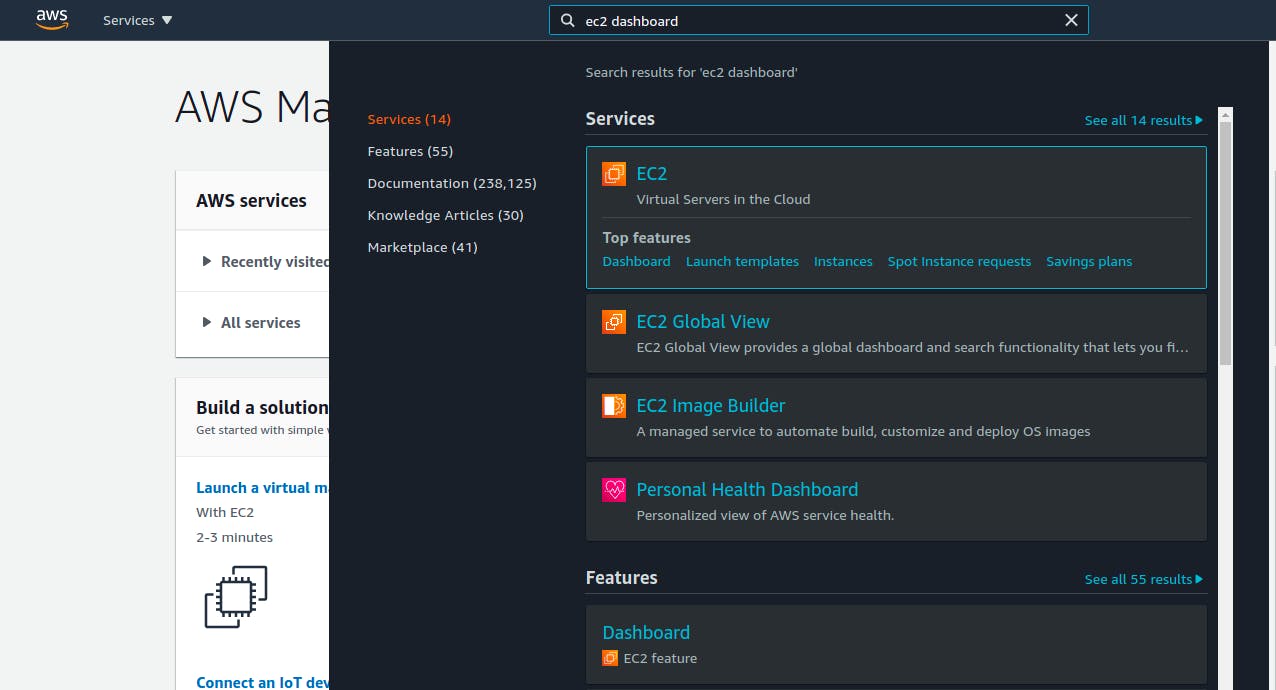
Search, for EC2 in amazon dashboard.
Now, open EC2 Dashboard
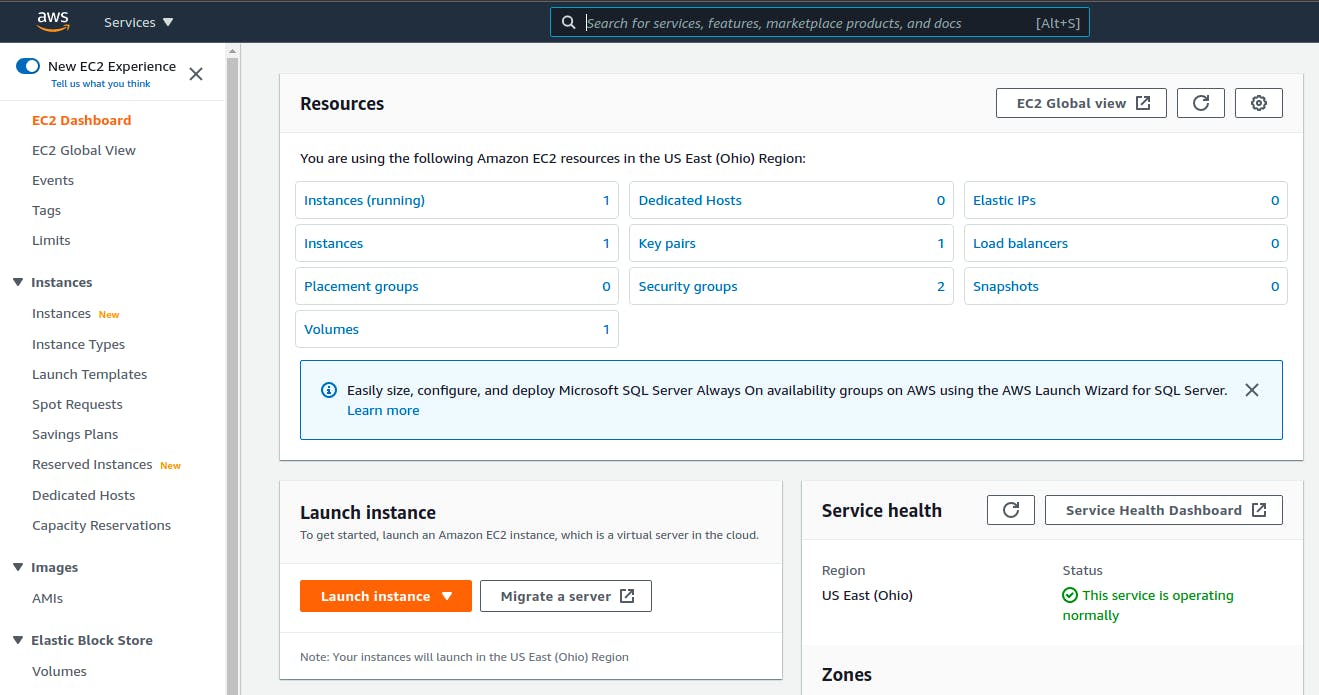
Then, Click on Launch instance To get started, launch an Amazon EC2 instance, which is a virtual server in the cloud.
STEP-3
Before Launching any instance you need to do following task
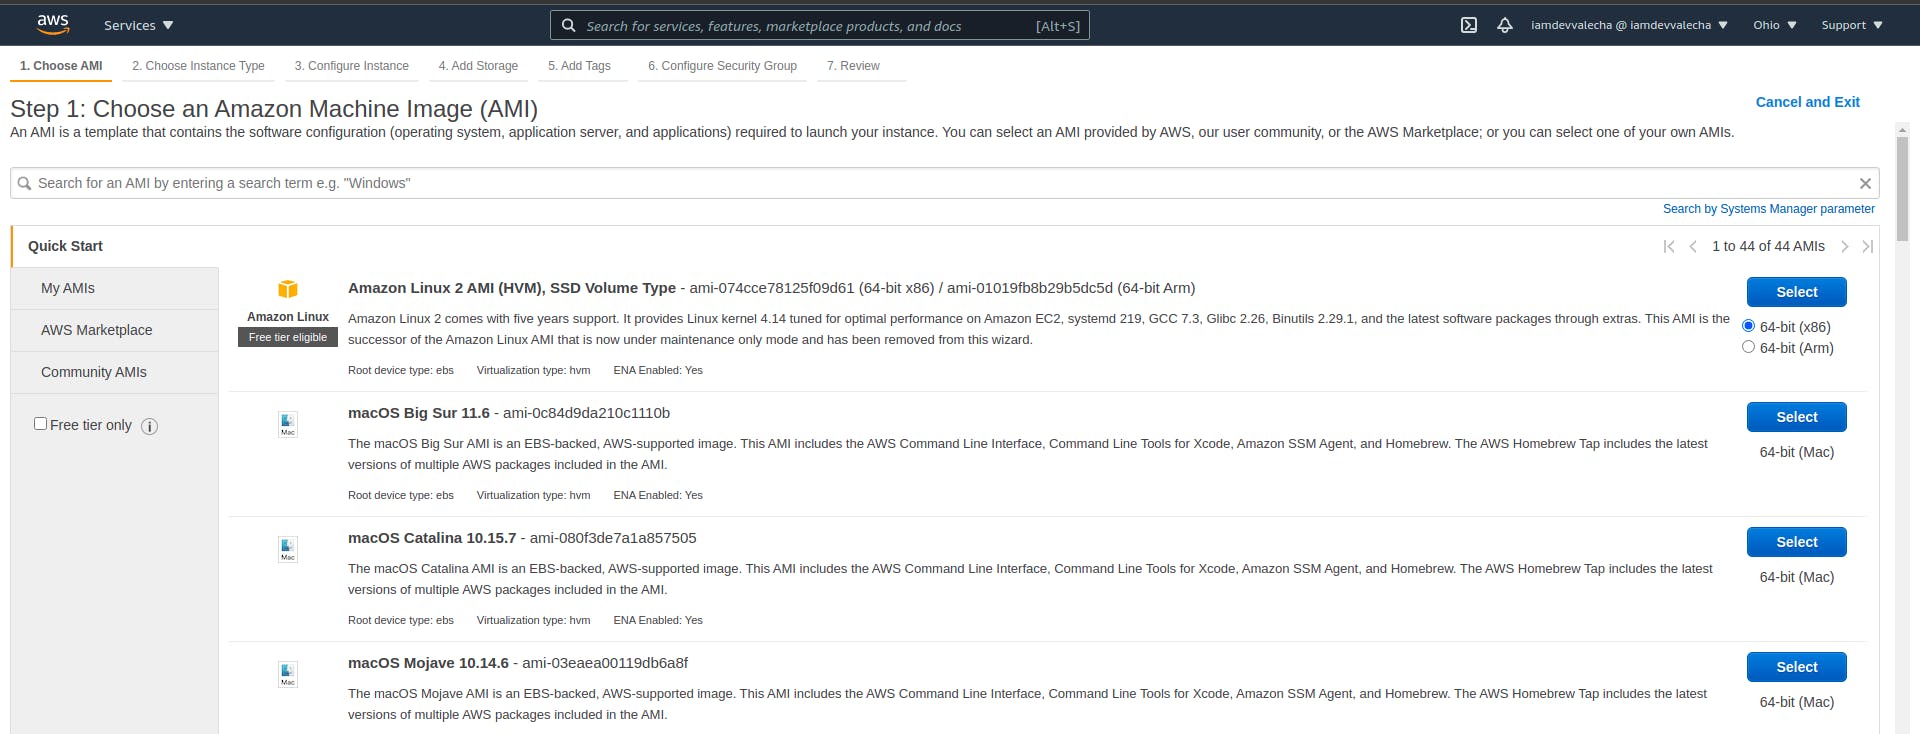
1: Choose an Amazon Machine Image (AMI)
An AMI is a template that contains the software configuration (operating system, application server, and applications) required to launch your instance. You can select an AMI provided by AWS, our user community, or the AWS Marketplace; or you can select one of your own AMIs.
Now, i will be launching demo instance.

So we will be selecting this instance which is also free.
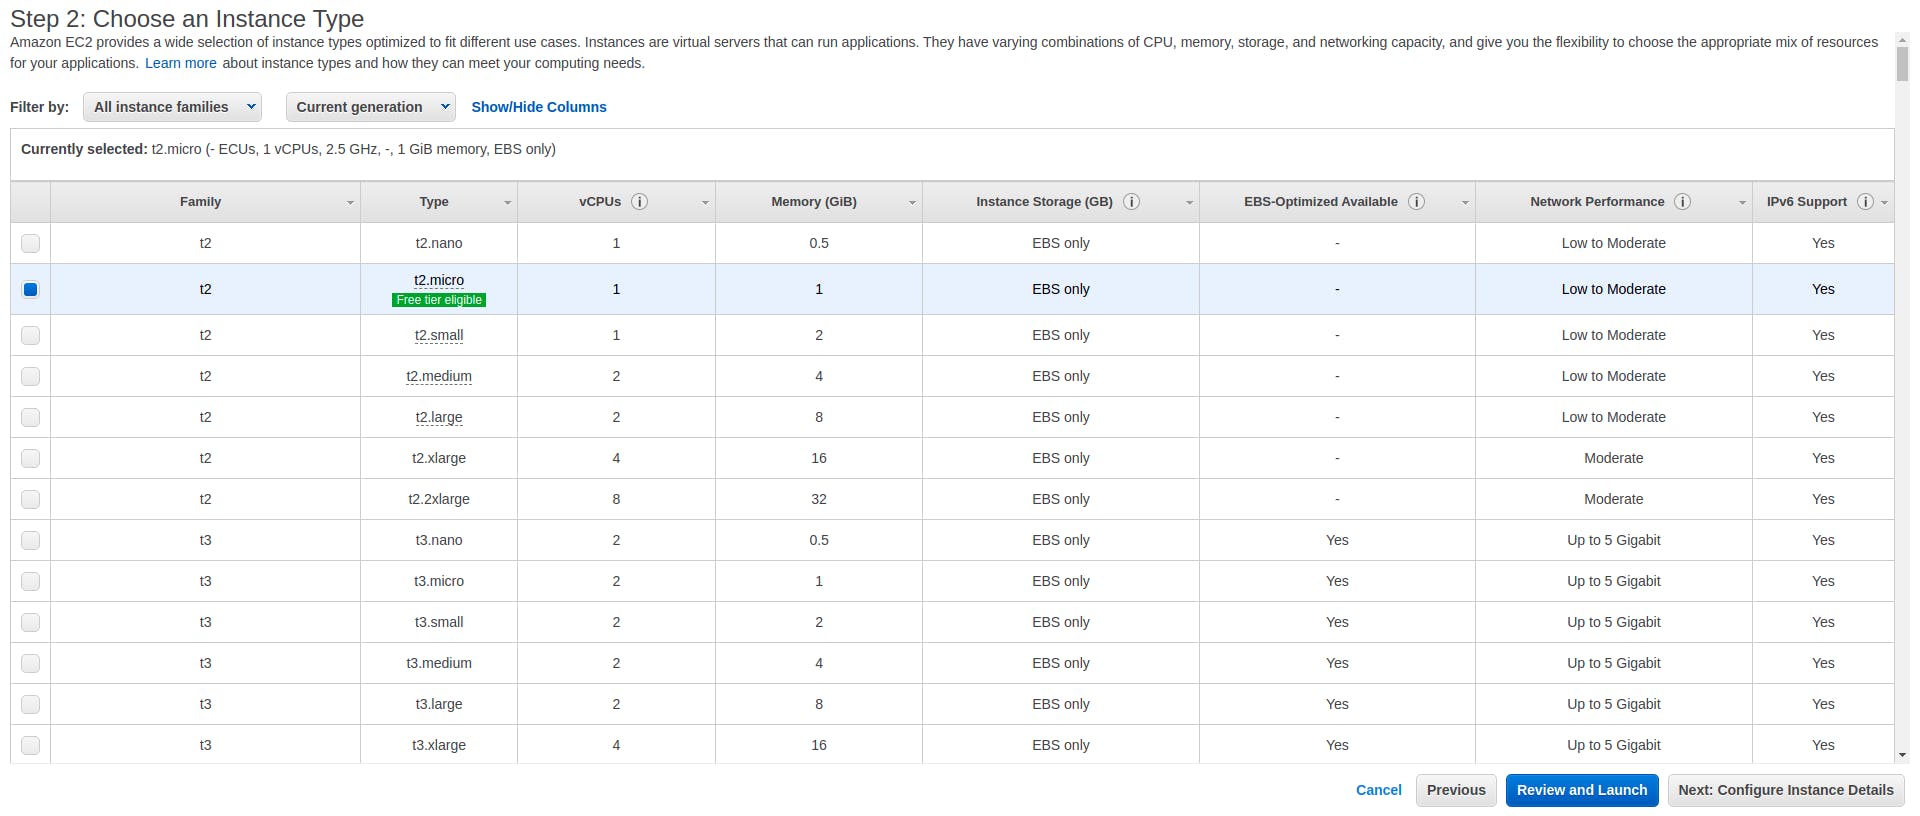
2: Choose an Instance Type
Amazon EC2 provides a wide selection of instance types optimized to fit different use cases. Instances are virtual servers that can run applications. They have varying combinations of CPU, memory, storage, and networking capacity, and give you the flexibility to choose the appropriate mix of resources for your applications.
IN SIMPLE WORDS How powerful you want your system to be ram, storage etc....
3: Configure Instance Details
Configure the instance to suit your requirements. You can launch multiple instances from the same AMI, request Spot instances to take advantage of the lower pricing, assign an access management role to the instance, and more.
4: Add Storage
Your instance will be launched with the following storage device settings. You can attach additional EBS volumes and instance store volumes to your instance, or edit the settings of the root volume. You can also attach additional EBS volumes after launching an instance, but not instance store volumes. Learn more about storage options in Amazon EC2.
Step 5: Add Tags A tag consists of a case-sensitive key-value pair.
DO It is a very good habbit whenever you launch any instance you should add the oragnization and name for it.
See below

6: Review Instance Launch
Here, It is providing a brief summary whatever we have done.
Now, click on Launch the instance.
STEP-4
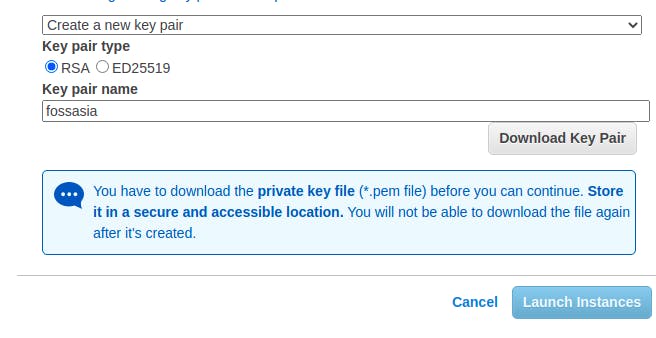
Creating a new key pair
A key pair consists of a public key that AWS stores, and a private key file that you store. Together, they allow you to connect to your instance securely. For Windows AMIs, the private key file is required to obtain the password used to log into your instance. For Linux AMIs, the private key file allows you to securely SSH into your instance. Amazon EC2 supports ED25519 and RSA key pair types.
STEP-5
Download key pair and Launch Instance
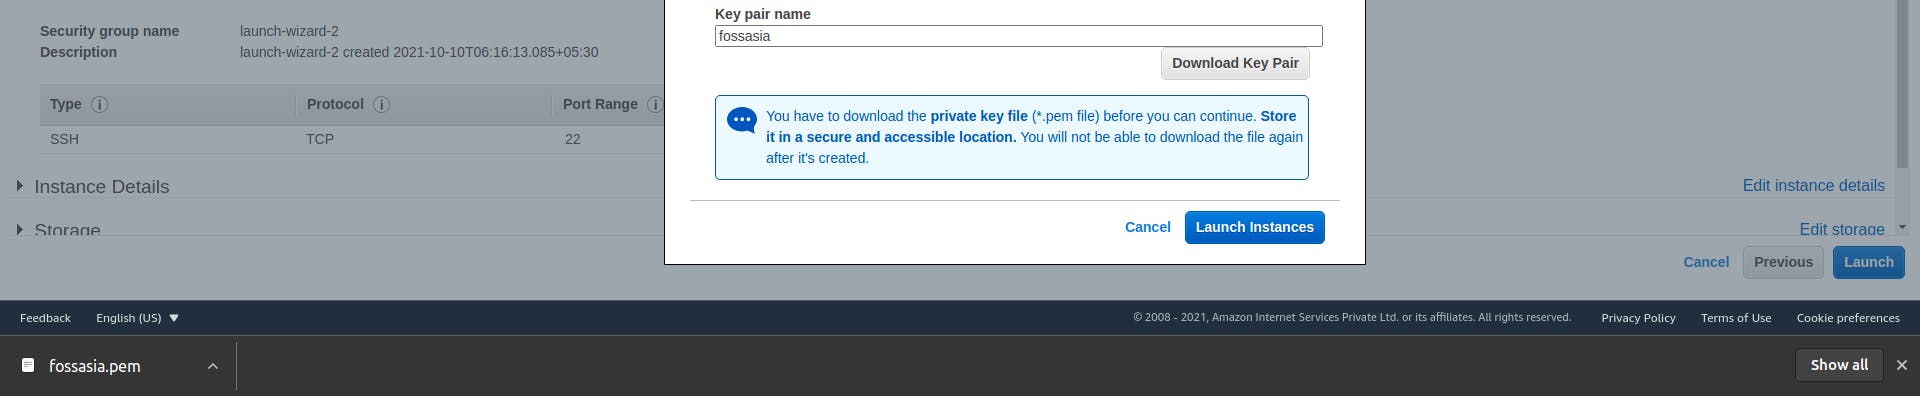
HURRAY! Your Instance has been sucessfully launched.
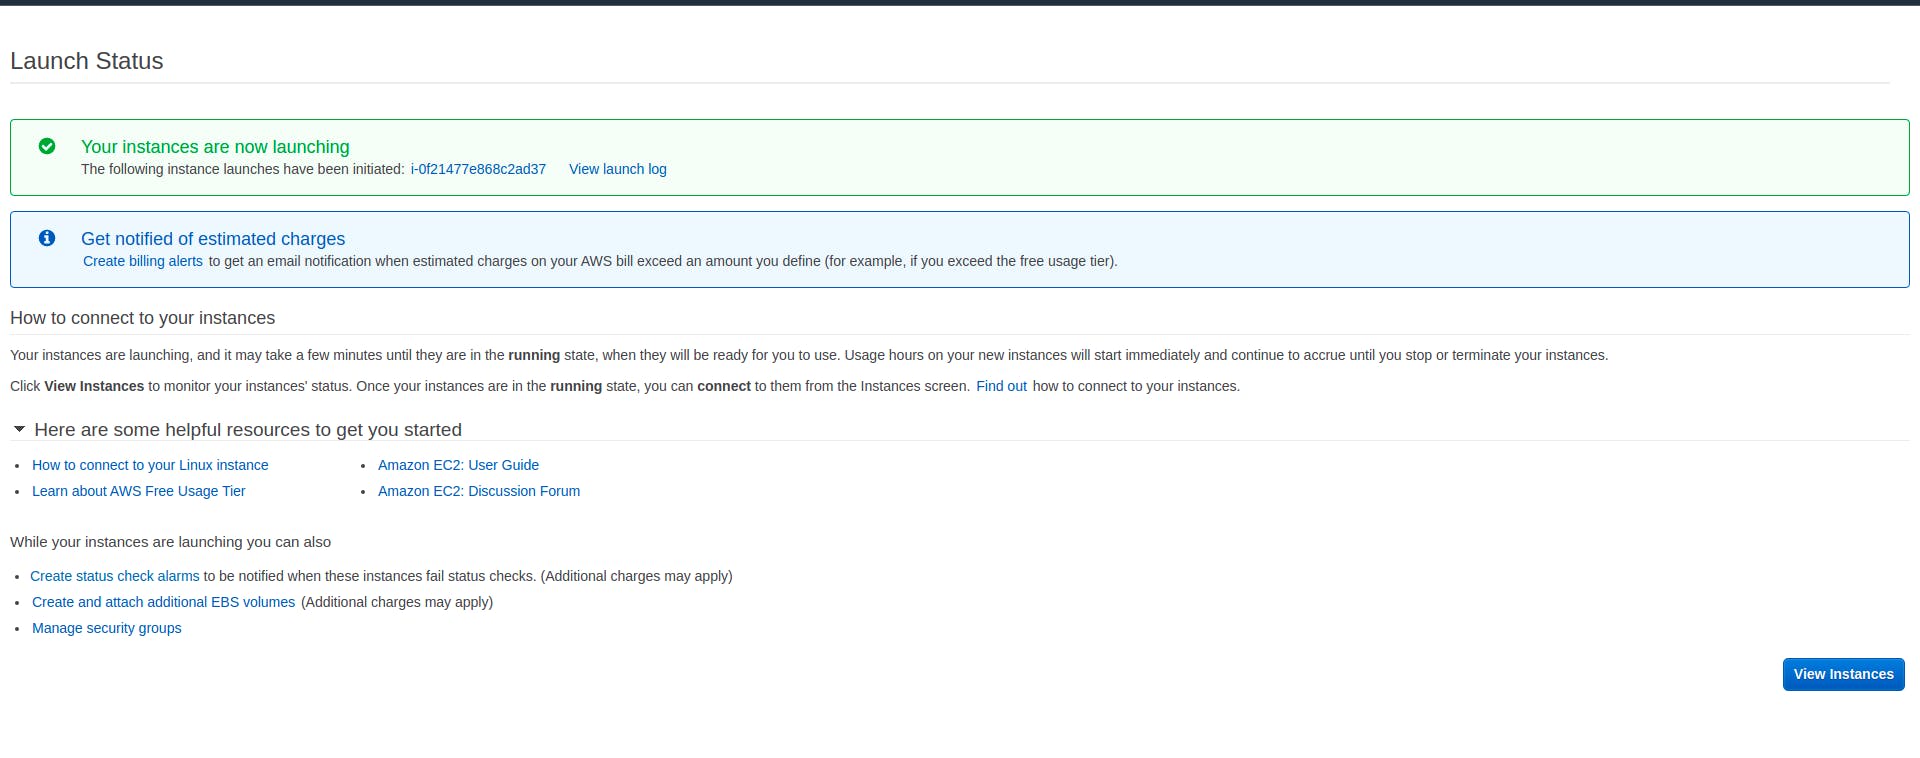
Now, We Will Turn On EC2 Machine Into Classic Web Server.
After, launching the instance we can we here it's in running state.
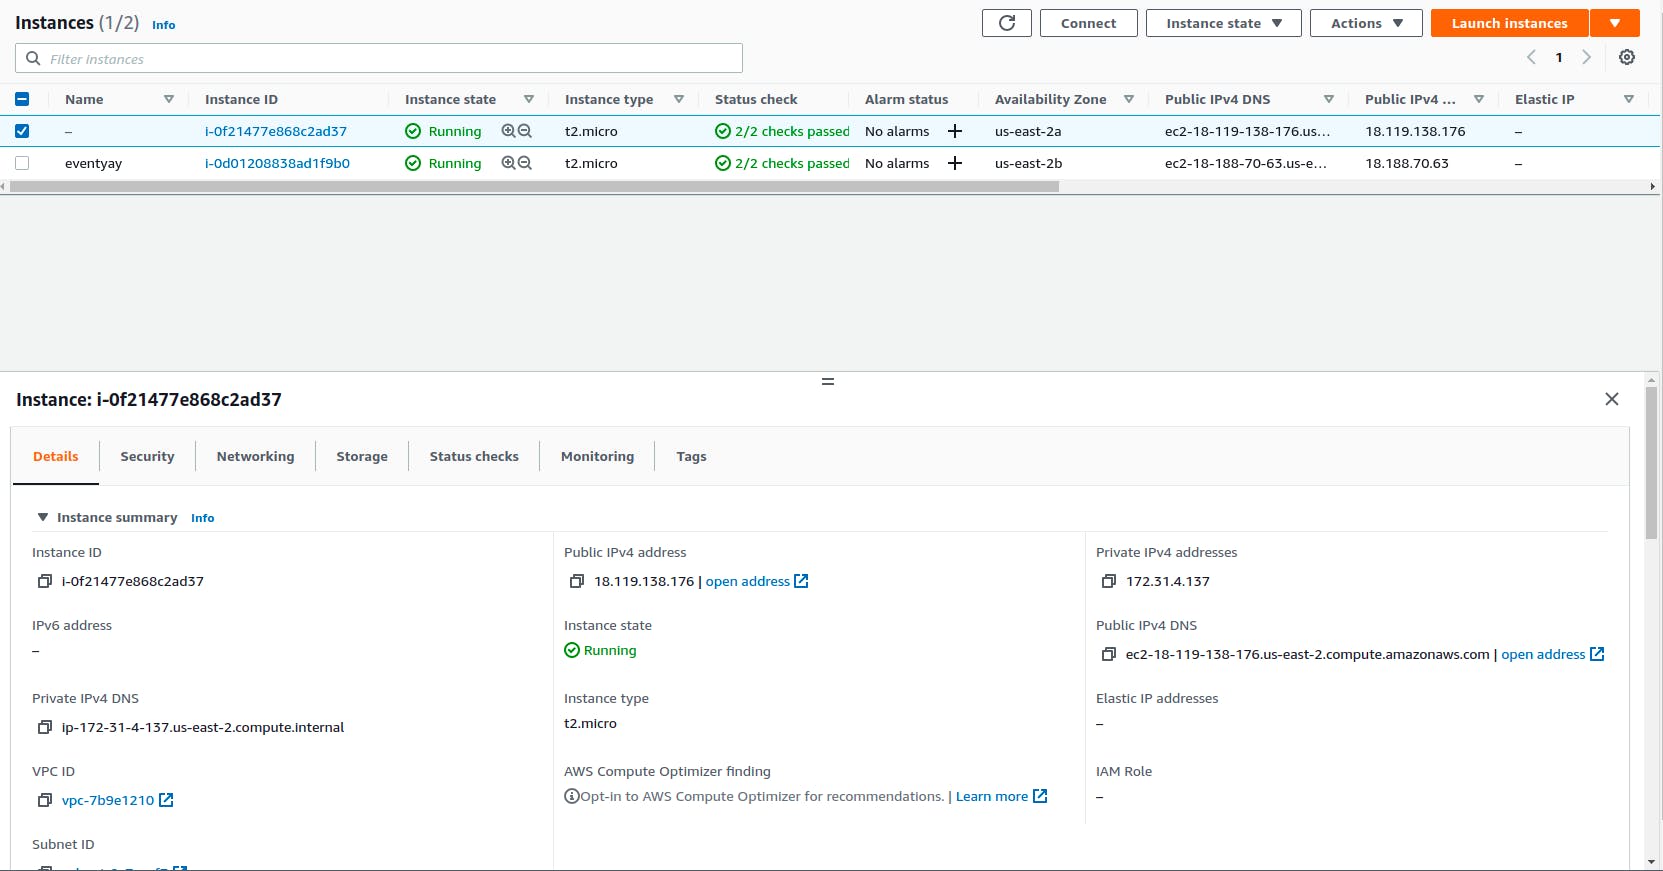
The First thing comes to your mind is not connecting the machine and installing packages on that , but rather comes to security.
Security is most essential thing when we move thing into production so, this is thing that should come to your mind.
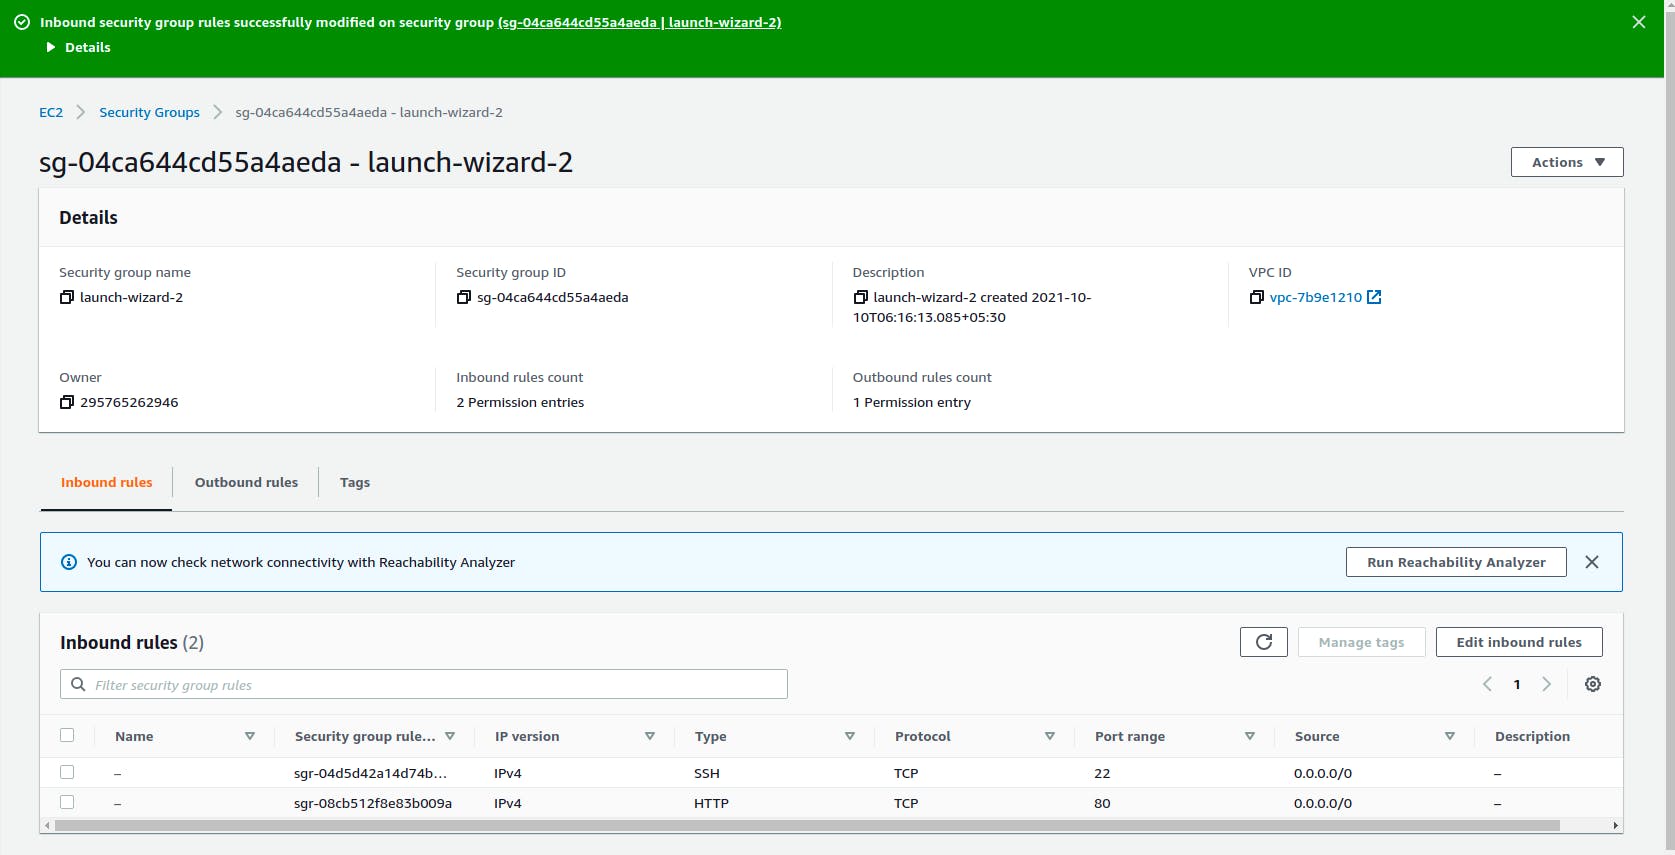
Click on Security then go and click on Security groups
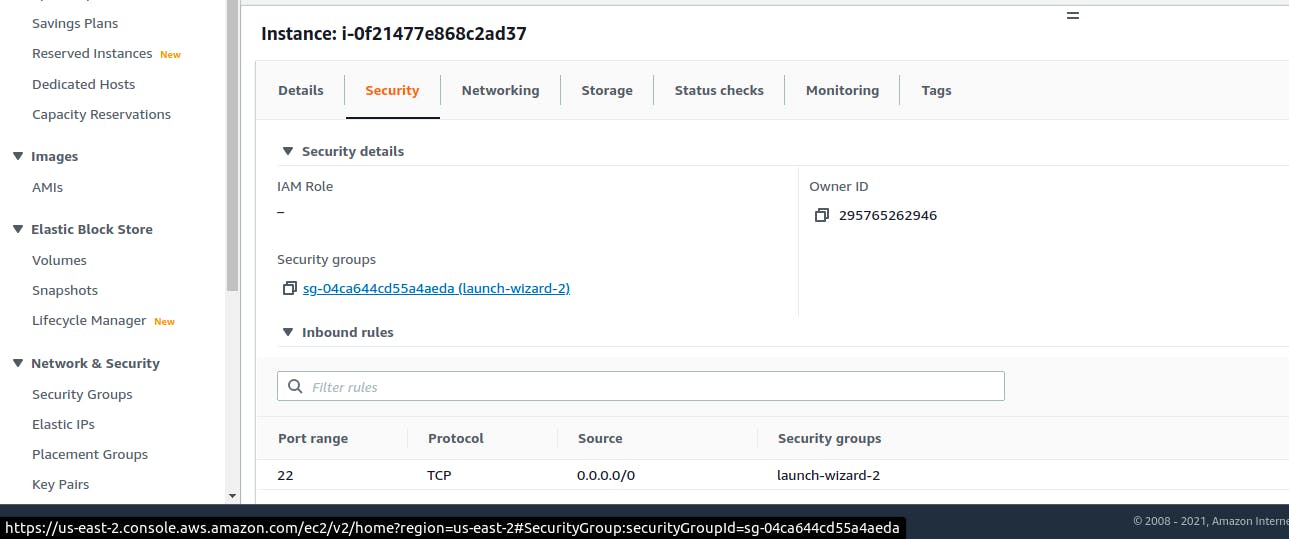
Dashboard of Security groups:

As, you can see their are some inbound roles and some outbound roles.
Outbound role says all the traffic is allowed basically, from the machine anybody or machine can access to internet to update the packages or install anything.
Inbound role says who is allowed to get into my machine says SSH, and that's we are allowed to go through into these machines through the file .pem or .cert file that we downloaded while creating the instance.
Now, since the web traffic is also gonna come in i want to allow that anybody can access my web traffic on port 80.
Click on edit inbound role and we will add the role so, this role will be HTTP and with source of ANYWHERE and then we IPV4 & IPV6 so, both of the trffic is allowed.
Just, a quick side note our machine is allowed to talk on internet so, all most lot of services are allowed to talk by default but, in some of the cases if your machine is struggling a little bit , you might want to check this security roles again in that application.
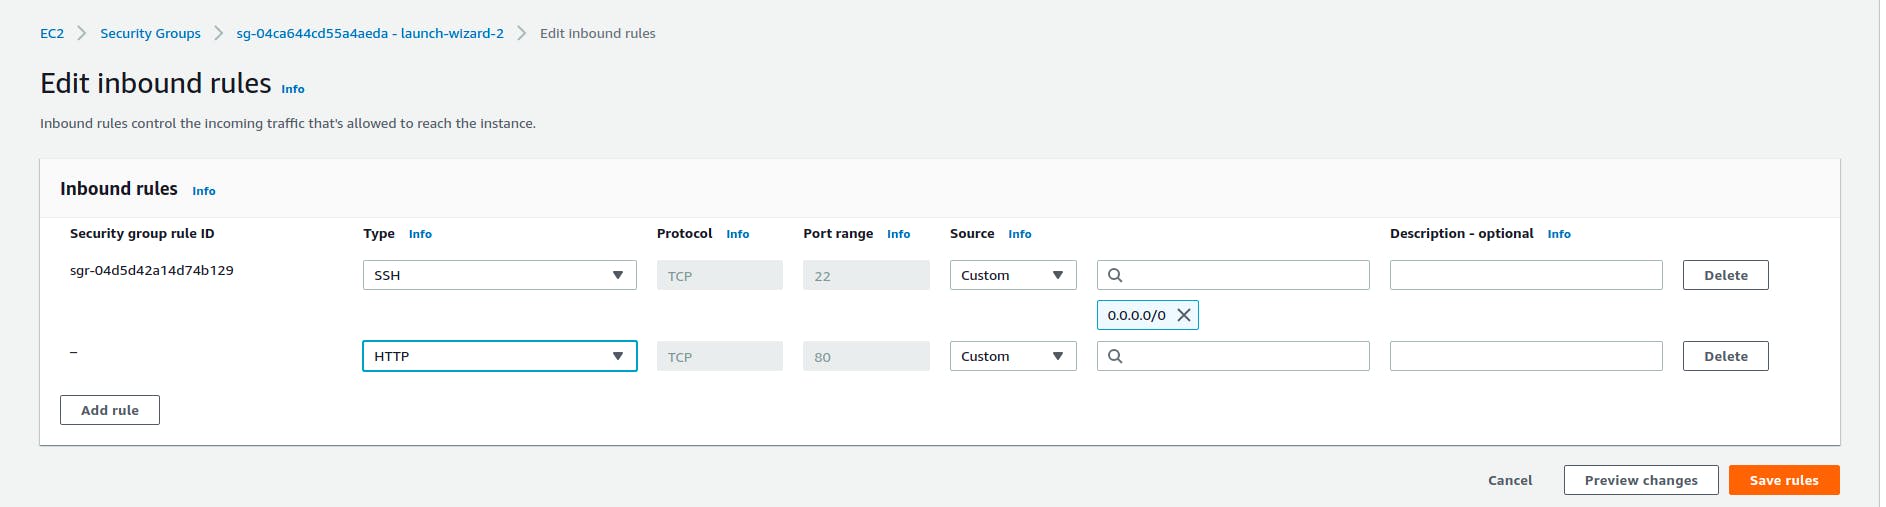
After, this save the role.
Now, let's go on EC2 now in most of the cases on the running EC2 will be connecting through SSH .PEM or .CERT file. but now we will access this directly via terminal or web browser. But their are some special scenarios where we connnect through SSH because their are some port forwarding that's is allowed via SSH.
Now, right click on the instance that you have created and click on connect.
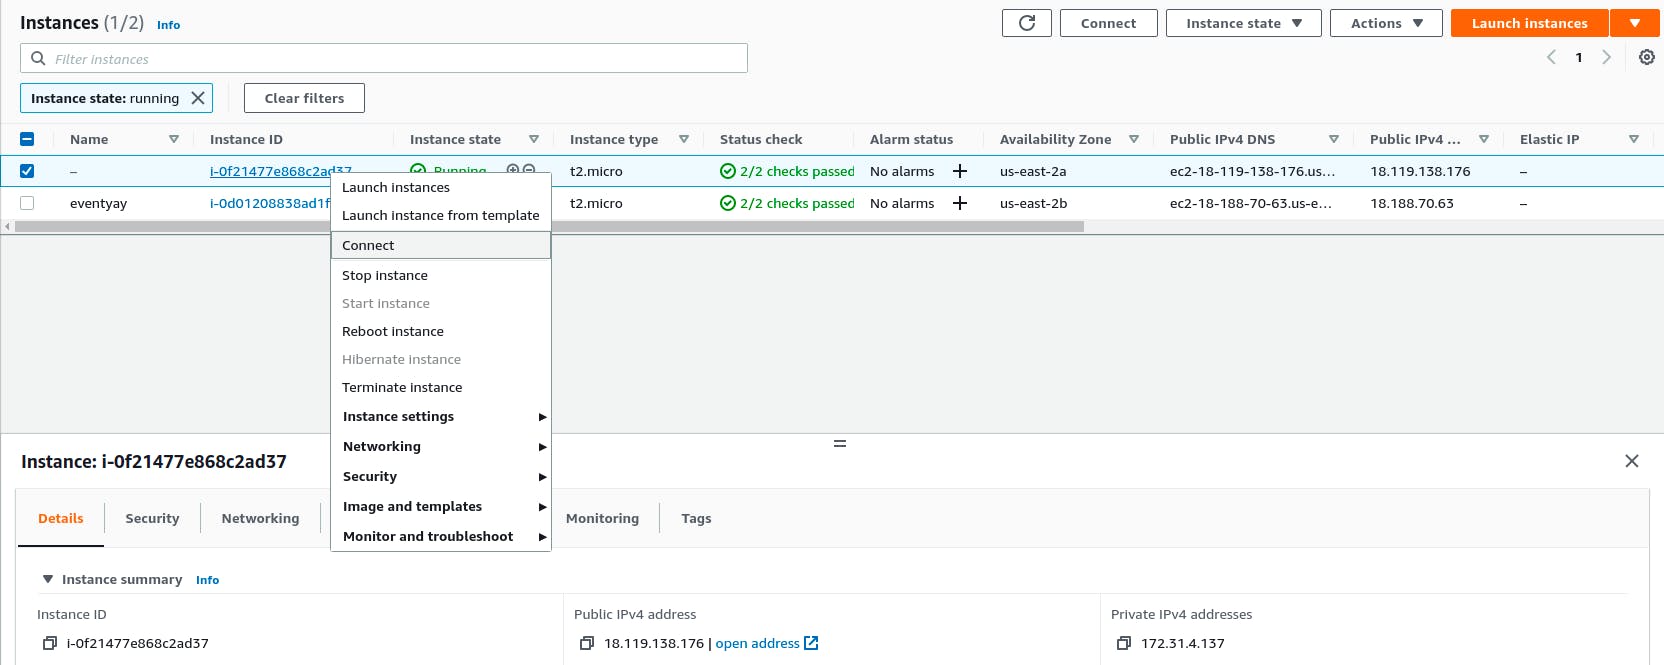
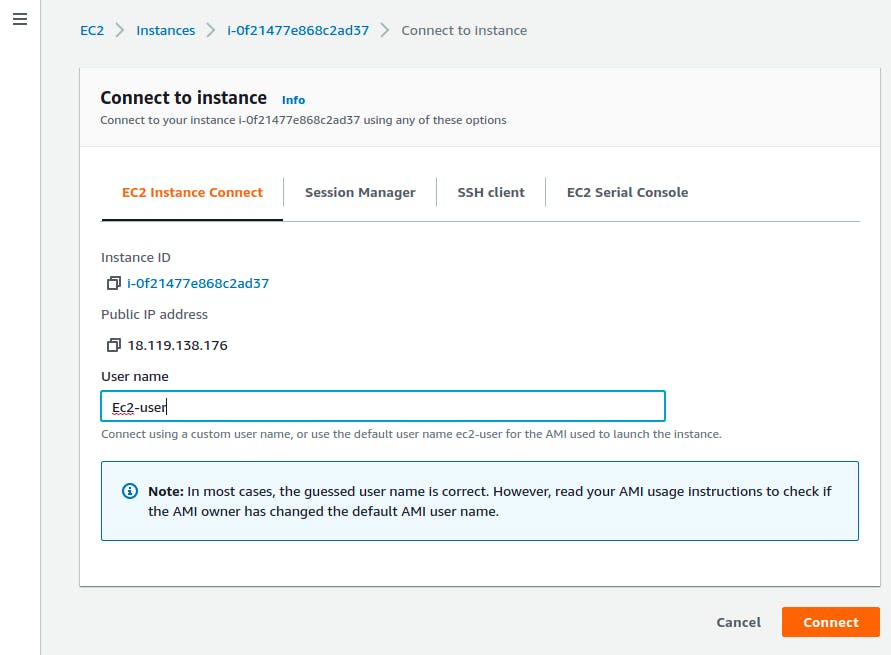
Here we are at Connect to instance page now, in user name provide anything i have provided ec2-user and then hit on connect button.
DASHBOARD
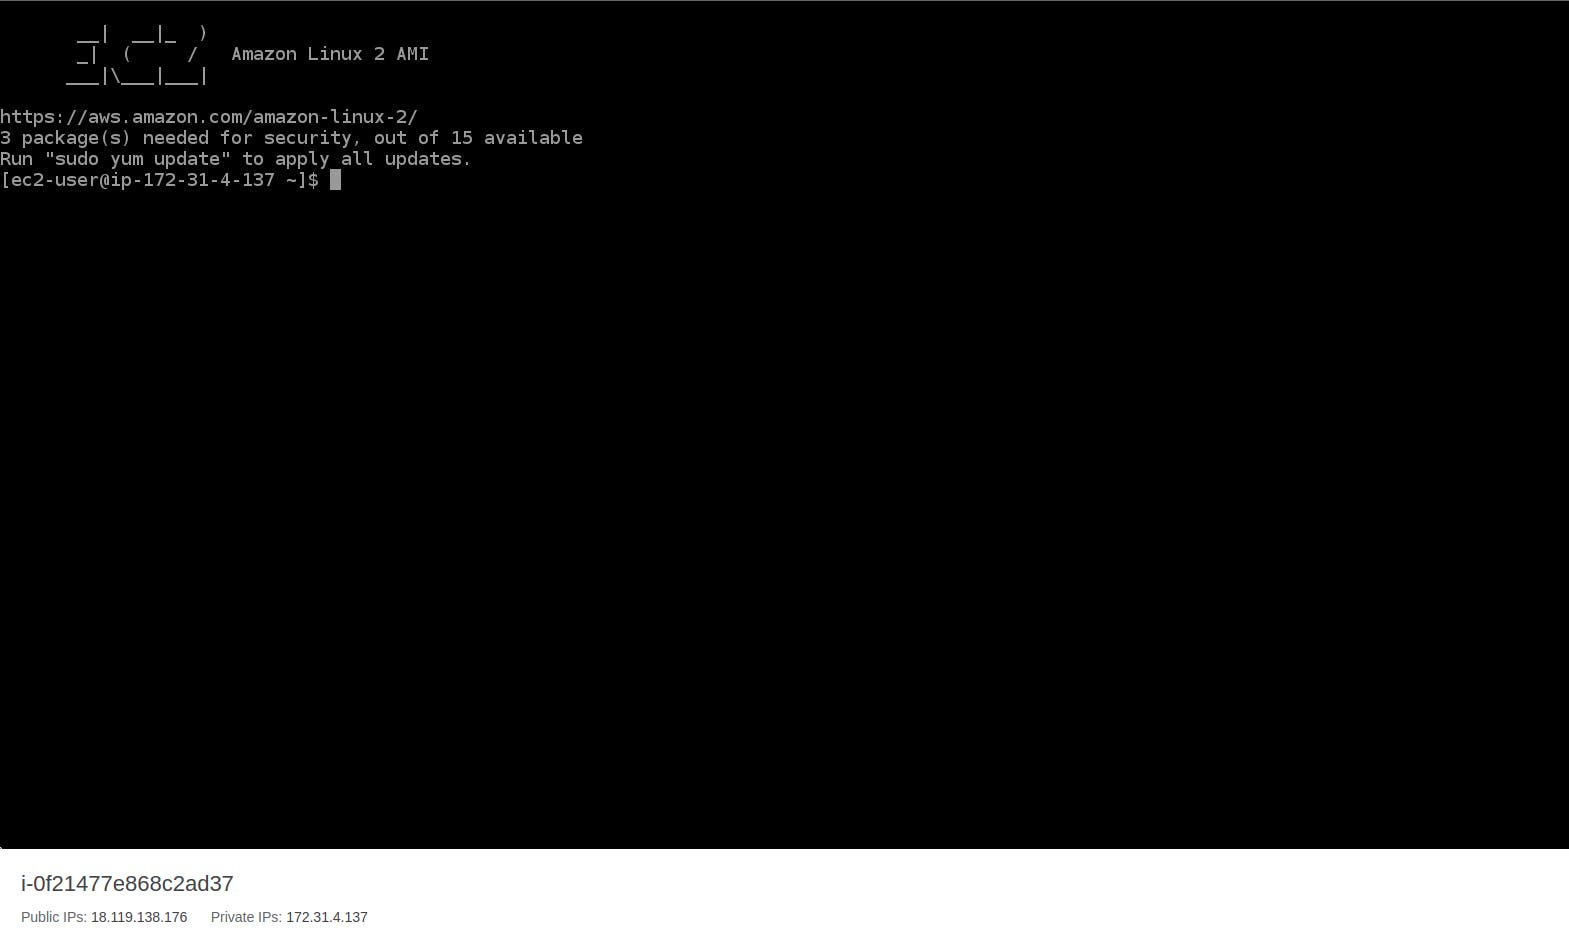
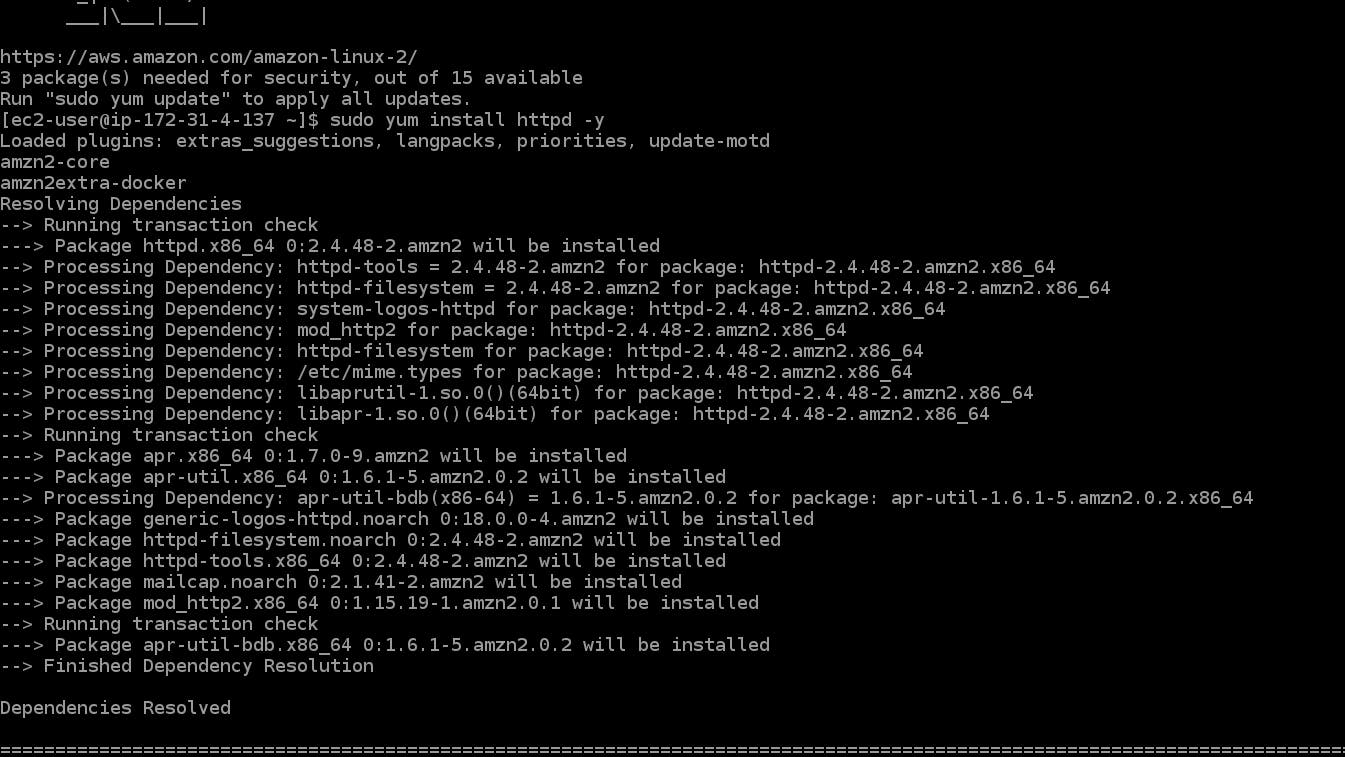
Now, here we will install some packages as follows : Here httpd is demon for http
sudo yum install httpd -y
Now, hit enter and wait for dependencies to install. WHY? WAIT HEY, Amazon ridiculously fast. it will not take any time.
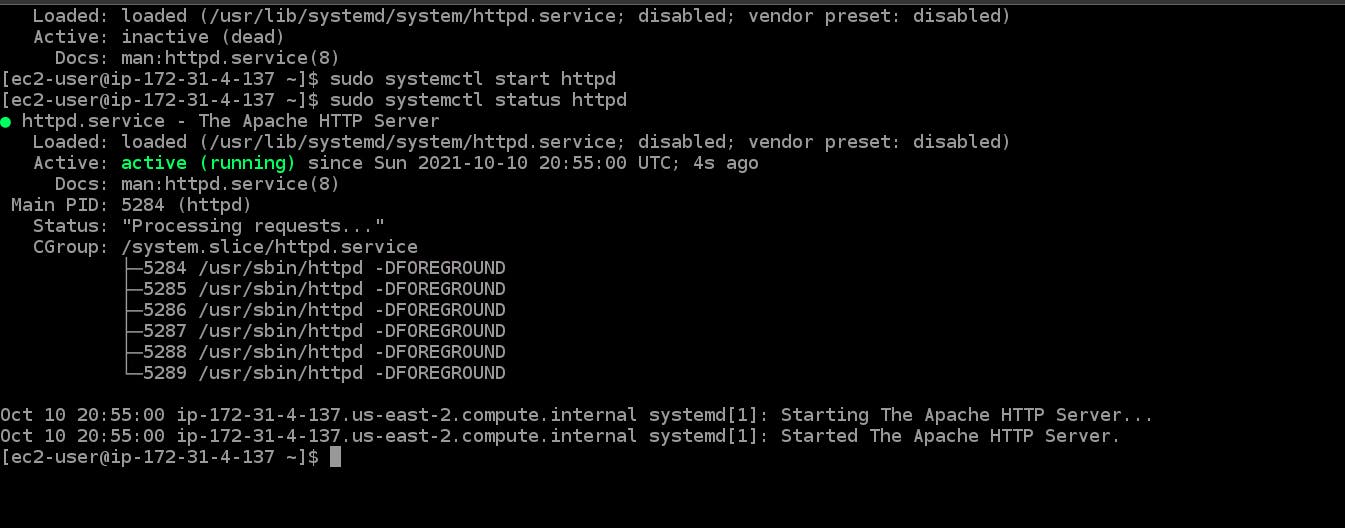
Now, check the status of demon httpd.
sudo systemctl status httpd

So, right now it's inactive in order make it active we have to start it.
sudo systemctl start httpd
Now after running this previous command you can see it's status it's active.
Also, whenever we will restart the system it will be inactive to avoid this run this cmd line.
sudo systemctl enable httpd

Now we will move the folder which is given by httpd
cd /var/www/html/

Now we are inside folder html. and here we will keep our basic index.html file.
Also, sometimes writing sudo sudo can make your bored. so,
sudo su
By running this cmd we will take more rights. and now you are root user.

And, now i will create a file.
echo "<h1>Welcome to Amazon</h1>" > index.html
now your index.html file is created.
cat index.html
And, you can also see the output via this command.

Finally, now go back to instance and copy the public ip address.
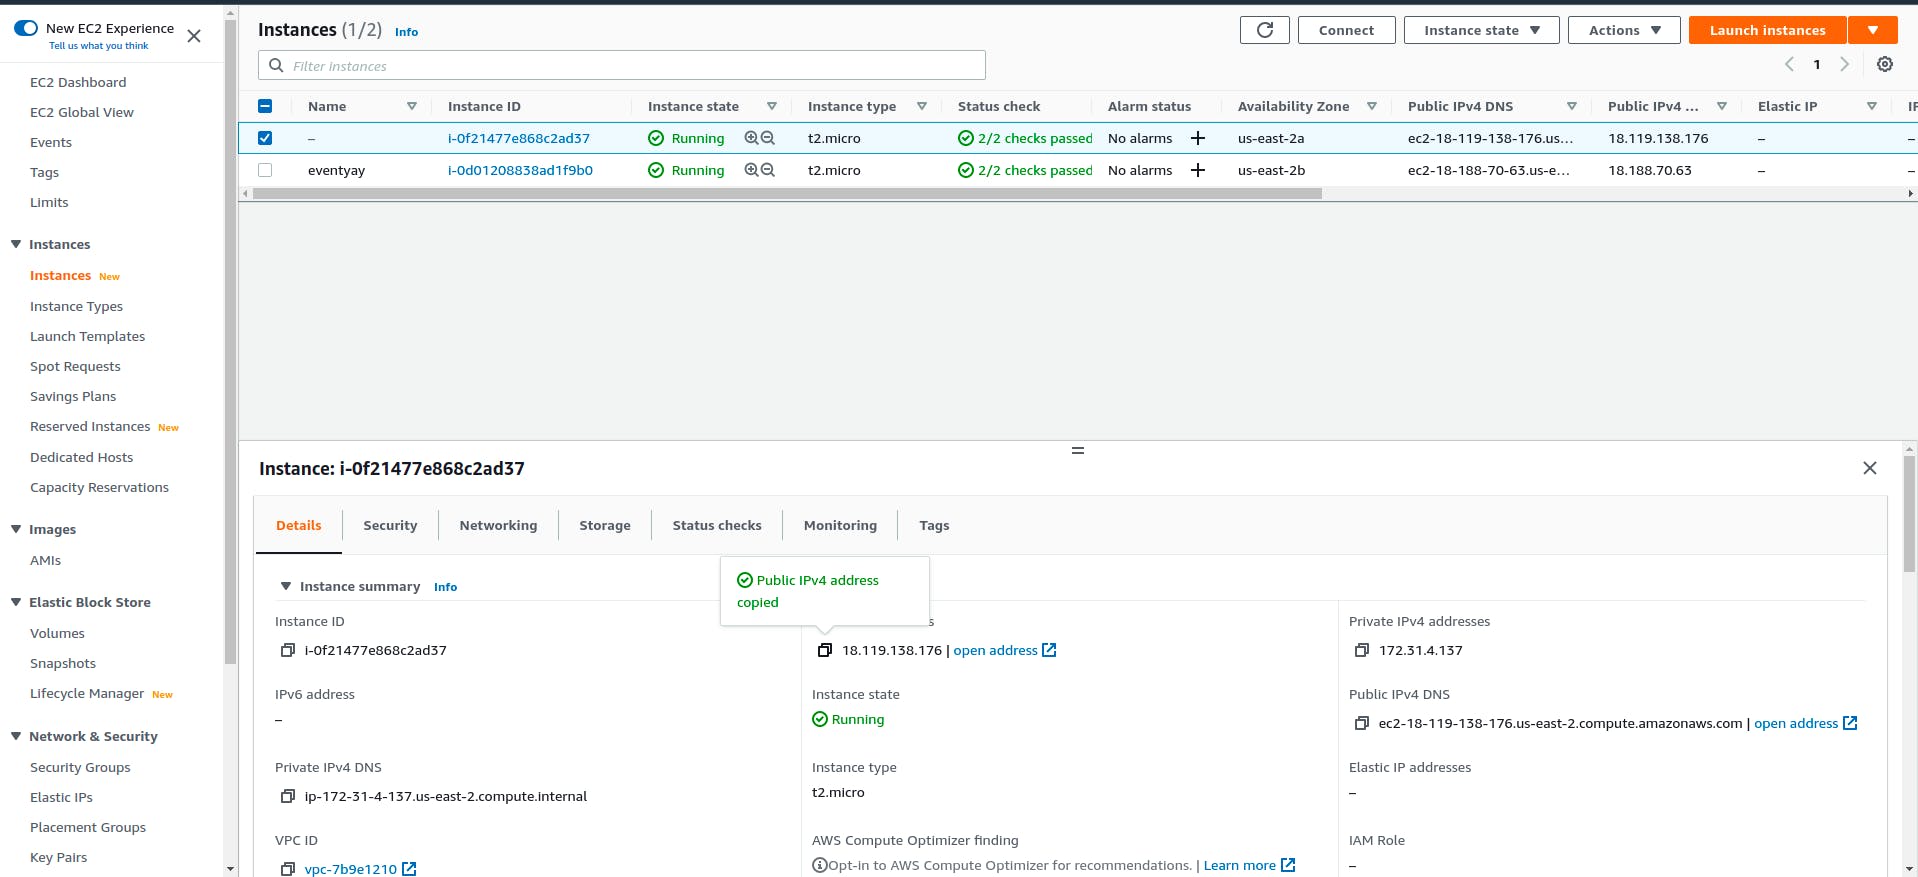
Now, open new tab and paste your PublicIp:80 For eg:- as my ip is 18.119.138.176 add : colun 80 so it becomes 18.119.138.176:80
 HERE WE GO :

We are here with server up and running. Now, you learnt how to create machine and turn into a webserver.
Thanks for reading this blog. Keep writing amazing code Happy Hacking! Happy Coding! Please follow me me for such amazing blogs.
